The moment you catch a whiff of the sugary, creamy layers in this No-Bake Fun Dessert, your taste buds will start doing the cha-cha. Imagine a delightful concoction that’s as easy to make as it is tempting to devour, with flavors that dance on your tongue like they just won a talent show. honeybun cheesecake delight This dessert is perfect for those hot summer nights when the thought of turning on the oven makes you break out in a sweat—yes, even the thought can be exhausting!

Jump to:
- Ingredients for No-Bake Fun Dessert
- How to Make No-Bake Fun Dessert
- <strong>Perfecting No-Bake Fun Dessert Cooking Process</strong>
- <strong>Add Your Touch to No-Bake Fun Dessert</strong>
- <strong>Storing & Reheating No-Bake Fun Dessert</strong>
- <strong>FAQs About No-Bake Fun Dessert</strong>
- What is No-Bake Fun Dessert?
- How do I make a No-Bake Fun Dessert?
- Can I use gluten-free ingredients for No-Bake Fun Dessert?
- How long does a No-Bake Fun Dessert last?
- <strong>Conclusion for No-Bake Fun Dessert</strong>
- 📖 Recipe Card
Now, let me take you down memory lane. Picture this: it’s a family gathering, and everyone is gathered around with smiles as bright as the sun. Suddenly, your Aunt Sara brings out her famous No-Bake Fun Dessert. As she unveils it, the room fills with ooohs and aaahs that could rival a concert crowd. You remember how each spoonful was like tasting happiness itself; creamy, sweet, and oh-so-satisfying! Now it’s your turn to recreate that magic. For more inspiration, check out this refreshing lemon bars recipe.
Why You'll Love This No-Bake Fun Dessert
- This amazing No-Bake Fun Dessert offers more than just flavor; it makes meal prep a breeze
- You can easily customize the ingredients based on what you have on hand
- The vibrant colors and aromas make it visually stunning on any dinner table
- Perfect for grilling but versatile enough for baking or pan-searing
Ingredients for No-Bake Fun Dessert
Here’s what you’ll need to make this delicious No-Bake Fun Dessert:
Crushed Graham Crackers: These form the crunchy base layer; opt for honey-flavored ones for an extra sweetness kick.
Butter: Use unsalted butter to control the salt level; it holds together your crust like a pro.
Cream Cheese: Make sure it’s softened to room temperature so it blends smoothly into that luscious filling.
Powdered Sugar: For that sweet touch, sift it to avoid lumps—nobody likes surprise crunches in their dessert!
Vanilla Extract: Go for pure vanilla extract if possible; it adds depth and warmth to every bite.
Whipped Topping: Lighten up the cream cheese mixture and add fluffiness—think clouds made of sweetness!
Your Favorite Toppings: Think sprinkles, chocolate chips, or fruit! Customize as per whimsy or mood.
The full ingredients list, including measurements, is provided in the recipe card directly below.

How to Make No-Bake Fun Dessert
Follow these simple steps to prepare this delicious No-Bake Fun Dessert:
Step 1: Prepare Your Crust
Melt butter in a microwave-safe bowl until completely liquid. Mix crushed graham crackers into the melted butter until well combined. Press this mixture firmly into the bottom of a greased dish (a square or rectangular one works great) to create your crust.
Step 2: Make the Creamy Filling
In a large mixing bowl, beat softened cream cheese until smooth using an electric mixer. Gradually add powdered sugar and vanilla extract while continuing to beat until fully combined and fluffy.
Step 3: Fold in Whipped Topping
Gently fold in whipped topping into your cream cheese mix using a spatula. Be careful not to deflate all that airy goodness—you want lightness here!
Step 4: Layer It Up
Spread half of your creamy filling over the graham cracker crust evenly. Then add another layer of crushed crackers if you’re feeling ambitious! Finally, pour over the remaining filling and smooth out with your spatula.
Step 5: Chill Like a Boss
Cover your dessert with plastic wrap and refrigerate for at least four hours—or overnight if you’re really patient—for optimal set-up time.
Step 6: Add Your Toppings
Just before serving, unleash your creative side! Top with sprinkles or chocolate chips—and don’t forget those fresh fruits if you’ve got them handy!
Transfer to plates and drizzle with sauce for the perfect finishing touch.
And there you have it—the ultimate No-Bake Fun Dessert ready to wow friends and family alike! You might even find yourself making excuses just so you can whip this beauty up again—and why not? It’s fun, flexible, and absolutely scrumptious! Enjoy every last spoonful because life’s too short not to indulge!
You Must Know About No-Bake Fun Dessert
- This amazing No-Bake Fun Dessert offers more than just flavor; it makes meal prep a breeze
- You can easily customize the ingredients based on what you have on hand
- The vibrant colors and aromas make it visually stunning on any dinner table
- Perfect for grilling but versatile enough for baking or pan-searing
Perfecting No-Bake Fun Dessert Cooking Process
To create your No-Bake Fun Dessert, start by combining your base ingredients in a mixing bowl. While that chills, prepare your toppings to ensure the final assembly is seamless and efficient. This sequence guarantees a delightful dessert every time.
Add Your Touch to No-Bake Fun Dessert
Feel free to swap out traditional ingredients for healthier options, like Greek yogurt instead of cream cheese or honey instead of sugar. Toss in some nuts or fresh fruits for extra crunch and flavor; the sky’s the limit with this customizable treat.
Storing & Reheating No-Bake Fun Dessert
Store your No-Bake Fun Dessert in an airtight container in the refrigerator for up to a week. If you need to reheat, do so gently in the microwave for a few seconds, but remember, this dessert is best enjoyed chilled!
Chef's Helpful Tips for No-Bake Fun Dessert
- This amazing No-Bake Fun Dessert offers more than just flavor it makes meal prep a breeze
- You can easily customize the ingredients based on what you have on hand
- The vibrant colors and aromas make it visually stunning on any dinner table
- Perfect for grilling but versatile enough for baking or pan-searing
Creating layers adds flair—start with a layer of crust, then alternate fillings and toppings for visual appeal.
Avoid overmixing when combining ingredients; this keeps your dessert light and prevents it from becoming dense.
Use room temperature ingredients whenever possible; they blend more easily and result in a smoother texture.
One time, my friend took one bite of my No-Bake Fun Dessert at a potluck and exclaimed it was the perfect end to her day! It brought smiles all around!
FAQs About No-Bake Fun Dessert
What is No-Bake Fun Dessert?
No-Bake Fun Dessert refers to a delightful category of sweets that require no oven or baking time. These desserts typically combine easy-to-find ingredients like cream cheese, chocolate, or fruit, resulting in quick and hassle-free preparation. Perfect for busy schedules or hot days, a no-bake fun dessert offers endless possibilities for creativity. fun cheesecake tacos You can layer different flavors and textures, making it an exciting treat for everyone. Whether you create a chilled cheesecake or a layered parfait, these desserts are sure to impress without the fuss of traditional baking.
How do I make a No-Bake Fun Dessert?
Creating a no-bake fun dessert is as simple as combining your favorite ingredients. Start by choosing a base—this could be crushed cookies or graham crackers for texture. Next, mix in your filling, such as whipped cream or pudding. Layer the ingredients in your desired dish and refrigerate until set. rich chocolate pudding You can then finish with toppings like fresh fruits or chocolate shavings. The beauty of this method lies in its versatility; you can easily customize flavors to suit your preferences.
Can I use gluten-free ingredients for No-Bake Fun Dessert?
Absolutely! You can make a delicious no-bake fun dessert using gluten-free ingredients. Many recipes allow you to substitute traditional ingredients with gluten-free options such as almond flour or gluten-free cookies for the crust. delicious pistachio cookie bars Additionally, ensure that any pre-packaged items like whipped toppings are certified gluten-free. This way, everyone can enjoy your tasty creation without dietary concerns.
How long does a No-Bake Fun Dessert last?
A well-prepared no-bake fun dessert can last up to five days when stored properly in the refrigerator. Make sure to cover it with plastic wrap or keep it in an airtight container to maintain freshness and prevent drying out. If you notice any changes in texture or smell, it’s best to discard it. Enjoying these desserts within the first few days will ensure they taste their best!
Conclusion for No-Bake Fun Dessert
In summary, the no-bake fun dessert offers an easy and enjoyable way to satisfy your sweet tooth without the need for baking. With versatile ingredients and simple steps, anyone can create an impressive treat that tastes amazing. Remember to experiment with flavors and textures, customizing each dessert to your liking. Whether you’re hosting a party or just treating yourself, this delightful option is always a winner when you’re short on time but still want something delicious! Embrace the joy of creating your own no-bake fun dessert today!
Did You Enjoy Making This Recipe? Please rate this recipe with ⭐⭐⭐⭐⭐ or leave a comment.
📖 Recipe Card
Print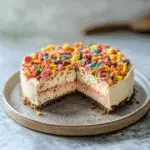
No-Bake Fun Dessert
- Total Time: 15 minutes
- Yield: Serves 8
Description
Indulge in the delightful layers of this No-Bake Fun Dessert, a creamy and sweet treat perfect for warm summer nights. With its luscious filling and crunchy graham cracker base, this nostalgic favorite is easy to prepare and sure to impress at any gathering. Just mix, layer, and chill for a dessert that will leave everyone asking for seconds!
Ingredients
- 1 ½ cups crushed graham crackers
- ½ cup unsalted butter (melted)
- 8 oz cream cheese (softened)
- 1 cup powdered sugar
- 1 tsp pure vanilla extract
- 2 cups whipped topping
- Toppings of your choice (sprinkles, chocolate chips, or fruit)
Instructions
- Prepare the crust by mixing melted butter with crushed graham crackers. Press into a greased dish to form a base.
- In a bowl, beat softened cream cheese until smooth. Gradually mix in powdered sugar and vanilla until fluffy.
- Gently fold whipped topping into the cream cheese mixture until well combined.
- Spread half of the creamy filling over the crust, followed by another layer of crushed crackers if desired. Top with remaining filling.
- Cover with plastic wrap and refrigerate for at least 4 hours or overnight for best results.
- Just before serving, add your chosen toppings.
- Prep Time: 15 minutes
- Cook Time: 0 minutes
- Category: Dessert
- Method: Chilling
- Cuisine: American
Nutrition
- Serving Size: 1 slice (100g)
- Calories: 280
- Sugar: 18g
- Sodium: 240mg
- Fat: 17g
- Saturated Fat: 10g
- Unsaturated Fat: 6g
- Trans Fat: 0g
- Carbohydrates: 29g
- Fiber: 1g
- Protein: 2g
- Cholesterol: 30mg


