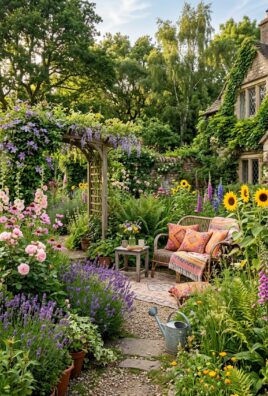
Creating a glass flower garden can transform your outdoor space into a vibrant oasis of color and creativity. If you’ve ever admired the intricate beauty of glass art but thought it could only belong indoors, think again! With the right approach, you can bring that stunning aesthetic outdoors, allowing you to enjoy a breathtaking display year-round.
In this guide, you’ll learn how to craft your own glass flower garden in just six easy steps. This project is perfect for both seasoned gardeners and enthusiastic beginners. So, grab your tools and let’s dive into the delightful world of glass flowers that will illuminate your garden and captivate anyone who visits.
Table of Contents
- What is a Glass Flower Garden?
- How Does a Glass Flower Garden Work?
- Benefits of a Glass Flower Garden
- Gather Your Materials
- Design Your Layout
- Create Your Glass Flowers
- Install Your Flowers
- Care for Your Garden
- Advanced Tips for Enhancement
- Conclusion
What Is It?
A glass flower garden is an innovative outdoor art installation that incorporates handcrafted glass flowers into your landscape. These stunning pieces can replicate the beauty of real blooms while providing an eye-catching and unique display that lasts throughout the seasons. Unlike traditional gardens, glass flower gardens offer a vibrant array of colors and shapes that won’t wilt or fade away.
Crafting a glass flower garden allows you to express your creativity while adding a personal touch to your yard. With various styles, sizes, and colors available, you can design a garden that reflects your personality and aesthetic preferences. It’s a delightful way to combine art and nature, making it a perfect project for garden enthusiasts and casual decorators alike.
- Glass flowers are durable and weather-resistant.
- They can add color and beauty year-round.
- Each piece can be a unique representation of your style.
How It Works
Glass flower gardens work by combining artistic elements with natural landscaping. The glass flowers serve as focal points, drawing attention and creating a visual contrast against traditional plants and soil. They can reflect light beautifully, adding an enchanting sparkle to your garden, especially during sunny days or at twilight.
The installation of glass flowers typically involves placing them into the ground or embedding them in pots, allowing for easy movement and rearrangement. This flexibility enables you to change the garden’s arrangement as seasons change or as new pieces are added, keeping the display fresh and exciting throughout the year.
- Glass reflects and refracts light, enhancing visual appeal.
- They can be arranged to create stunning visual focal points.
- Flexible placement allows for seasonal updates.
Key Benefits
- Year-Round Beauty — Glass flowers don’t wilt or fade, providing vibrant colors and shapes throughout the year. You can enjoy their beauty even in winter when other plants have gone dormant.
- Low Maintenance — Unlike traditional gardens that require regular watering and pruning, glass flower gardens need minimal upkeep. A periodic cleaning to remove dust is usually all that’s needed.
- Creative Expression — A glass flower garden is a fantastic way to showcase your creativity. You can choose colors, shapes, and arrangements that resonate with your personal style.
- Wildlife-Friendly — While glass flowers won’t attract pests like real flowers, they can still complement the natural flora, providing a backdrop that encourages beneficial wildlife to visit.
- Easy to Install — Creating a glass flower garden can be a simple DIY project that doesn’t require advanced gardening skills. You can start small and expand as you gain confidence.
Step-by-Step Guide
Step 1: Gather Your Materials

To start your glass flower garden, you’ll need a variety of materials. Visit your local craft store or online resources to find glass bottles, marbles, and other colorful glass pieces. Don’t forget about tools like a glass cutter, epoxy glue, and a sturdy base for your flowers. Ensure you have a mix of sizes and colors to create an eye-catching display.
After gathering your materials, choose a workspace where you can comfortably assemble your flowers. This area should be well-lit and have a flat surface where you can lay out your designs before securing them together.
Example: For a whimsical touch, consider using repurposed glass bottles in vibrant colors.
Pro Tips:
- Look for unique glass pieces at local thrift stores.
- Consider using LED lights for added illumination at night.
- Ensure all glass is clean before assembly for maximum shine.
Step 2: Design Your Layout

Before you start assembling your glass flowers, sketch out a layout for your garden. Think about how you want to arrange the flowers for maximum visual impact. Consider height, color balance, and spacing. You might want taller flowers at the back of the garden and shorter ones in the front to create depth.
Once you have a basic layout, you can use stakes or markers in your garden bed to indicate where each piece will go. This will help you visualize the final arrangement and make adjustments before installation. Remember, your design should reflect your personal style, so feel free to get creative with it!
Example: You might create a wave pattern with varying heights for a dynamic effect.
Pro Tips:
- Take a photo of your layout for reference during installation.
- Use a mix of textures and shapes for added interest.
- Consider seasonal changes; plan for how your garden will look year-round.
Step 3: Create Your Glass Flowers

Now comes the fun part: assembling your glass flowers! Start by selecting a base for each flower, which can be a sturdy glass bottle or a combination of smaller pieces glued together. Use epoxy glue to secure the layers, ensuring that you allow adequate drying time for each piece.
For added creativity, consider layering different colors of glass or incorporating other materials like metal or wood for stems. Think about the overall height and shape of each flower as you create them. Don’t be afraid to experiment with various combinations until you achieve the look you desire.
Example: Consider creating a daisy-like flower using a round glass base and petal pieces arranged around it.
Pro Tips:
- Wear gloves and work in a well-ventilated area when handling glass.
- Allow ample drying time between layers to ensure stability.
- Use a variety of shapes to make your flowers more dynamic.
Step 4: Install Your Flowers

Once your glass flowers are complete, it’s time to install them in your garden. Carefully place each flower in its designated spot according to your layout. You might need to dig small holes for the stems or bases to ensure they stand firmly, especially if you live in a windy area. Be mindful of the arrangement, stepping back often to ensure the design flows beautifully.
If you’re using heavier pieces, consider using garden stakes for additional support. This will help maintain their position, particularly during storms or high winds. Once everything is in place, take a moment to admire your work and make any final adjustments as needed.
Example: For stability, use stakes for taller flowers to prevent them from tipping over.
Pro Tips:
- Choose a location with good visibility for maximum impact.
- Group flowers of similar colors together for a cohesive look.
- Consider the sun’s path when placing them to enhance their sparkle.
Step 5: Care for Your Garden

Caring for your glass flower garden is relatively simple but essential to keep it looking pristine. Regularly check for dust and debris on the glass pieces, especially after windy days. A gentle wipe with a soft cloth or sponge can help maintain their shine. Avoid abrasive materials that could scratch the surface.
During the winter months, depending on your climate, you might want to bring delicate glass flowers indoors or cover them to protect them from extreme weather. Keeping an eye on their stability in the soil is also crucial, ensuring they remain upright and secure as seasons change.
Example: Consider using a soft microfiber cloth to clean the glass without scratching.
Pro Tips:
- Use a garden hose to lightly spray off any dirt without damaging the glass.
- Store delicate pieces indoors during harsh weather.
- Regularly inspect for loose pieces and re-secure them as necessary.
Step 6: Advanced Tips for Enhancement

Once you’ve mastered the basics of your glass flower garden, consider enhancing it with additional elements. Adding reflective surfaces, like mirrors or metallic accents, can amplify the light play and create stunning visuals. You might also incorporate solar-powered garden lights to illuminate your flowers at night, creating a magical atmosphere.
Consider planting complementary real flowers around your glass pieces to provide a natural contrast. This can create a beautiful blend of art and nature, enhancing the overall aesthetic of your garden. Additionally, experimenting with different heights and arrangements can keep your design dynamic and engaging.
Example: Using mirrors can create interesting reflections that enhance your garden’s beauty.
Pro Tips:
- Explore seasonal themes; change decorations to match the holidays.
- Incorporate outdoor seating to create a cozy atmosphere.
- Use wind chimes or other sound elements to enhance the sensory experience.
Advanced Tips
Incorporate Color Theory
Understanding color theory can elevate your glass flower garden design. Use complementary colors for a striking contrast or analogous colors for a harmonious look. Experimenting with shades and tones can create depth and interest, making your garden a true visual delight.
Seasonal Adaptations
As the seasons change, consider adapting your glass flower garden to reflect different themes or holidays. You can create seasonal displays using themed glass pieces or additional decorations that resonate with the time of year. This keeps your garden fresh and engaging for visitors.
Interactive Elements
Incorporating interactive elements, like a small fountain or wind chimes, can enhance the sensory experience in your garden. The sound of water and movement can create a serene environment that complements the visual beauty of your glass flowers.
Mix with Real Plants
Integrating real plants with your glass flowers can create a stunning contrast. Choose plants that bloom at different times of the year for continued interest, and select foliage that complements the colors of your glass pieces. This strategy enhances biodiversity in your garden.
Tools & Resources
- Epoxy Glue — Essential for securely bonding glass pieces together, epoxy glue ensures that your flowers hold up against the elements. It’s strong, durable, and resistant to water, making it perfect for outdoor use. — Available at: Home Depot, Amazon
- Glass Cutter — A glass cutter is crucial for shaping and customizing your glass pieces. With the right technique, you can create unique designs that fit perfectly into your garden’s theme. — Available at: Lowe’s, ACE Hardware
- Colorful Glass Pieces — Look for a variety of colorful glass pieces, including bottles, marbles, and shards, to create your flowers. These can often be found at craft stores or online marketplaces. — Available at: Michaels, Etsy
- Garden Stakes — Garden stakes provide additional support for taller glass flowers, ensuring they remain upright and stable. These are easy to use and can be found in various heights to accommodate your designs. — Available at: Home Depot, Walmart
- Protective Gear — When working with glass, protective gear such as gloves and goggles is essential to ensure your safety while cutting and assembling pieces. — Available at: Amazon, local hardware stores
Frequently Asked Questions
How long will my glass flower garden last?
A glass flower garden can last for many years with proper care. Glass is inherently durable and weather-resistant, making it suitable for outdoor environments. Regular cleaning and maintenance will help preserve the vibrancy of your flowers.
In climates with extreme weather conditions, consider bringing delicate pieces indoors during harsh seasons to prolong their lifespan.
Can I use recycled glass for my flowers?
Absolutely! Using recycled glass is a fantastic way to create unique flowers while being environmentally conscious. You can repurpose old bottles, jars, and other glass items to craft your flowers, giving them a new life in your garden.
Just ensure that the glass is clean and in good condition before using it in your designs.
Do glass flowers attract pests?
No, glass flowers do not attract pests as real flowers might. This characteristic makes them particularly appealing for gardeners who want to avoid the hassle of dealing with insects and other garden nuisances. However, you can still enjoy the beauty of traditional blooms by planting real flowers alongside your glass pieces.
Can I install glass flowers in pots?
Yes, you can create a stunning display of glass flowers in pots! This allows for greater flexibility in design and makes it easy to move your creations around your garden or even indoors. Just ensure that the pots are heavy enough to support the flowers and prevent tipping.
How do I clean my glass flowers?
Cleaning your glass flowers is simple. Use a soft cloth or sponge with mild soap and water to remove any dirt or dust. Avoid abrasive materials that could scratch the glass. Regular cleaning will keep your flowers looking vibrant and beautiful throughout the seasons.
Congratulations on embarking on the journey to create your very own glass flower garden! This project not only allows you to express your creativity but also brings a unique charm to your outdoor space that can be enjoyed year-round. You’ve learned how to gather materials, design layouts, and care for your beautiful creations.
Now that you have the tools and inspiration, it’s time to put your skills into action. Share your garden with friends and family, and don’t hesitate to experiment with new designs and ideas. Happy gardening!

Leave a Comment